Table of Contents
- Best Car Cleaning Hacks You Need to Know
- Why Bother with Car Cleaning Hacks? (Beyond the Shine)
- Essential DIY Car Cleaning Supplies (Your Hack Arsenal)
- Genius Interior Car Cleaning Hacks
- Exterior Car Cleaning Hacks That Wow
- Wheel and Tire Cleaning Hacks
- Window and Glass Cleaning Hacks
- Putting It All Together: A Routine That Works
- Conclusion: Your Car Will Thank You
- Frequently Asked Questions (FAQs)
Best Car Cleaning Hacks You Need to Know
Let’s be real, keeping your car looking showroom fresh can feel like a chore, right? Between drive thru spills, muddy footprints, and whatever mystery gunk appears on the dashboard, it’s a constant battle. But what if I told you there are ways to make cleaning easier, faster, and maybe even a little bit fun? Forget expensive detailing services or spending hours scrubbing. We’re diving deep into the world of car cleaning hacks – those clever, often surprising, tricks that use everyday items to achieve professional results. Ready to transform your ride from grimy to gleaming without breaking the bank or your back? Buckle up, because we’ve got the inside scoop!
Why Bother with Car Cleaning Hacks? (Beyond the Shine)
Okay, so a clean car looks nice. We get it. But is there more to it than just aesthetics? Absolutely! These hacks aren’t just about making your car sparkle; they offer some pretty significant practical benefits too. Think beyond the surface level shine for a moment.
Saving Time and Money
This is the big one, isn’t it? Professional detailing can cost a small fortune, and even dedicated car cleaning products add up quickly. Many of these hacks utilize common household items you probably already have – vinegar, baking soda, toothpaste, maybe even olive oil! This means fewer trips to the auto parts store and more money left in your wallet. Plus, these tricks are often quicker than traditional methods. Who wouldn’t want to spend less time scrubbing and more time enjoying their clean car?
Extending Your Car’s Life
Dirt, grime, bird droppings, tree sap, road salt – these aren’t just ugly; they can actually damage your car over time. Grime can trap moisture, leading to rust. Spills can stain upholstery permanently. Neglected dirt can wear down surfaces. By regularly cleaning your car using effective (and often gentle) hacks, you’re actively protecting its paint, interior fabrics, plastics, and metal components. It’s like preventative maintenance for your car’s appearance and integrity.
Boosting Resale Value
Thinking of selling or trading in your car down the line? A well maintained, clean car commands a significantly higher price than a neglected one. First impressions matter! A sparkling exterior and a spotless interior tell potential buyers that the car has been cared for. Using these hacks helps maintain that pristine condition, ensuring you get the best possible value when it’s time to part ways with your vehicle. It’s an investment that pays off.
Essential DIY Car Cleaning Supplies (Your Hack Arsenal)
Before we dive into the specific hacks, let’s gather our tools. You don’t need a professional detailing kit, but having a few key items on hand will make these tricks much more effective. Think of this as your car cleaning hack starter pack:
- Microfiber Cloths: Lots of them! They’re absorbent, non abrasive, and perfect for washing, drying, polishing, and cleaning interiors without leaving lint or scratches. Get different colors for different tasks (e.g., paint, windows, interior).
- Buckets: At least two. The classic two bucket wash method (one for soapy water, one for rinsing your wash mitt) is crucial to prevent scratching your paint with trapped dirt.
- Car Wash Soap (pH neutral): While some hacks use household cleaners, stick to proper car wash soap for the main bodywork. It’s designed to lift dirt without stripping wax or damaging paint. Dish soap is too harsh!
- Soft Bristle Brushes: Various sizes are helpful. Think old toothbrushes for tiny crevices, larger soft brushes for wheels and upholstery.
- Spray Bottles: Essential for mixing and applying DIY cleaning solutions like vinegar and water.
- Wet/Dry Vacuum or Shop Vac: Invaluable for sucking up dirt, crumbs, and debris from carpets and seats. Attachments help get into tight spots.
- Household Staples: White vinegar, baking soda, rubbing alcohol, olive oil (a tiny bit!), magic erasers, compressed air, maybe even toothpaste (the non gel kind!).
- Optional but Handy: Clay bar kit, wheel cleaner (specific or DIY), glass cleaner (specific or DIY), tire shine (specific or DIY).
Having these basics ready means you can tackle most cleaning jobs and implement these hacks whenever inspiration (or a spill) strikes!
Genius Interior Car Cleaning Hacks
The inside of your car is where you spend your time, so let’s make it a pleasant place to be. Forget sticky cup holders and dusty dashboards. These hacks will get your interior looking sharp.
Hack #1: The Magic Eraser for Stubborn Scuffs
You know those annoying scuff marks on door panels, dashboards, or vinyl seats that regular cleaners just won’t touch? Enter the magic eraser (melamine foam). Dampen it slightly (don’t saturate it) and gently rub the scuff mark. Seriously, it often works like magic! Be gentle, though, especially on darker plastics or leather, as it is mildly abrasive. Test in an inconspicuous spot first. It’s fantastic for lifting crayon marks left by little artists or those mysterious black streaks that appear out of nowhere.
Hack #2: Compressed Air for Nooks and Crannies
Vents, seams between panels, gear shift surrounds, radio buttons – these areas are crumb and dust magnets, and wiping just pushes the dirt deeper. A can of compressed air (like you use for keyboards) is your secret weapon. Use the straw attachment to blast dust and debris out of these tight spots *before* you wipe or vacuum. It makes a huge difference!
Getting Those Pesky Vents Clean
Air vents are notoriously tricky. After blasting with compressed air, grab a cheap foam craft brush or even a makeup brush. Lightly spray it with an all purpose cleaner (or your DIY vinegar solution) and use it to swipe inside the vent louvers. The foam or soft bristles grab the remaining dust easily. You’ll be breathing cleaner air in no time!
Hack #3: Olive Oil for a Shiny Dashboard (Use Sparingly!)
Want a natural looking shine on your dashboard and plastic trim without that greasy, dust attracting finish some commercial products leave? Try a *tiny* amount of olive oil. Put just a drop or two on a clean microfiber cloth, rub it in well, and then buff thoroughly with a separate dry cloth. The key is *sparingly* – too much will make it greasy. It conditions the plastic and leaves a subtle, rich sheen. Again, test on a hidden spot first, especially on older or lighter colored plastics.
Hack #4: Toothbrush Detailing for Tight Spots
Don’t throw away old toothbrushes! They are perfect detailing tools. Use a dry toothbrush to loosen dirt around seat stitching, emblems, textured plastic, and those awkward seams where panels meet. For tougher grime, dip the toothbrush lightly in your preferred interior cleaner or soapy water, scrub gently, and wipe away the residue with a microfiber cloth. It’s amazing for getting into places fingers and cloths can’t reach.
Hack #5: Baking Soda: The Odor Eliminator Extraordinaire
Funky smells lingering in your car? Baking soda is a natural and cheap deodorizer. Sprinkle it liberally over carpets and fabric seats, let it sit for at least 30 minutes (or even overnight for tough odors), and then vacuum it up thoroughly. It absorbs smells rather than just masking them. You can also leave an open box or a small container with holes poked in the lid under a seat to continuously absorb odors.
Tackling Spills and Stains Naturally
Baking soda also works wonders on fabric stains. Make a paste of baking soda and a little water. Gently rub it into the stain on your upholstery or carpet using a soft brush or cloth. Let it dry completely, then vacuum it up. For tougher stains, you might try a paste of baking soda and white vinegar (it will fizz!), scrub gently, let sit, and then blot with a damp cloth before vacuuming when dry. Always test on an inconspicuous area first, as vinegar can sometimes affect dyes.
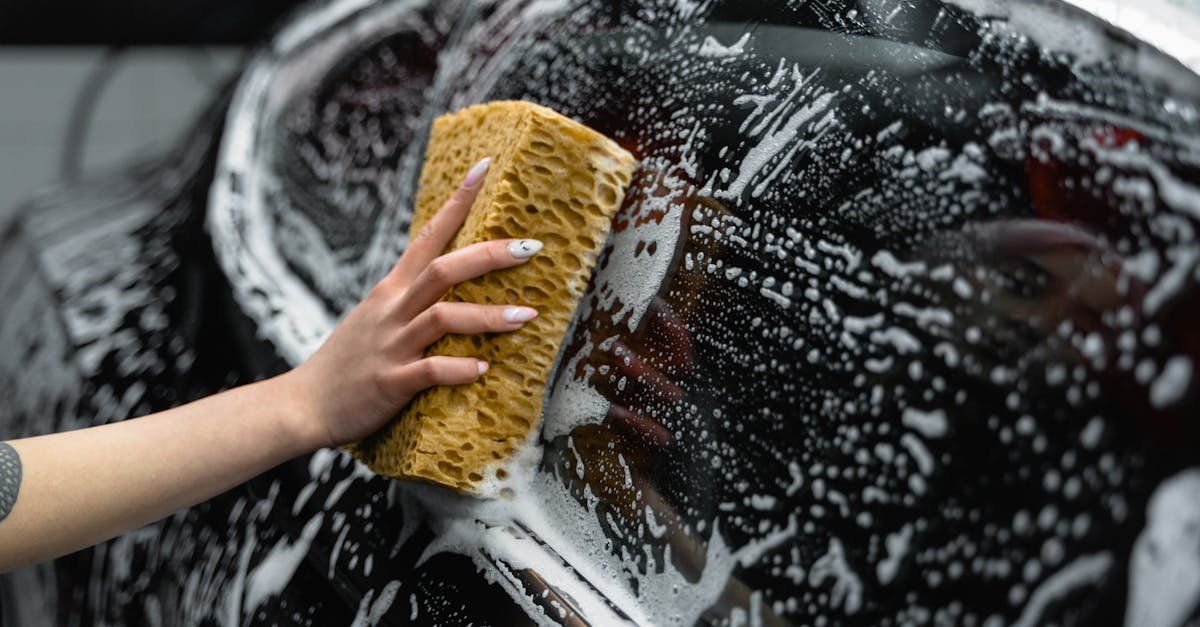
Exterior Car Cleaning Hacks That Wow
Now let’s move outside. Getting that head turning shine doesn’t always require expensive waxes or polishes. Sometimes, the best solutions are hiding in plain sight.
Hack #6: Clay Bar Treatment for Silky Smooth Paint
Okay, this one involves a specific product, but the *hack* is realizing how easy and effective it is for DIYers. Does your car’s paint feel rough even after washing? That’s bonded contamination (industrial fallout, rail dust, tree sap residue). A clay bar kit (which includes the clay and a lubricant spray) safely lifts these embedded contaminants. Wash and dry your car first. Then, spray a small section with the lubricant, flatten a piece of the clay bar, and gently glide it back and forth over the lubricated surface. You’ll feel the difference instantly as the clay picks up the grit. Wipe the residue, fold the clay to a clean side, and move to the next section. It leaves the paint incredibly smooth, ready for wax or sealant to bond properly. It sounds intimidating, but it’s surprisingly simple and makes a massive difference to the finish.
Hack #7: WD-40 for Bug and Tar Removal (Be Careful!)
Pesky bug guts splattered on your bumper? Stubborn tar spots clinging to your lower panels? WD-40 can often dissolve these effectively. Spray a small amount directly onto the affected area (avoiding plastic trim if possible), let it sit for a minute or two (don’t let it dry), and then gently wipe away the grime with a soft microfiber cloth. Important: WD-40 is a solvent. Wash the area thoroughly with car wash soap and water immediately afterward to remove any oily residue, which could potentially affect your paint’s sealant or wax over time if left on. Use it sparingly and precisely.
Hack #8: Dryer Sheets for Dead Bugs? (Myth vs. Reality)
You might have heard this one: rubbing a damp dryer sheet on bug splatters makes them disappear. Does it work? Kind of, sometimes. Dryer sheets contain fabric softeners and anti static agents that can help loosen dried on bugs. Dampen a used dryer sheet (new ones might leave residue) and gently rub the bug splatters. However, they can also be slightly abrasive, so rub very gently and rinse the area well afterward. Honestly, a dedicated bug and tar remover or even the WD-40 trick is often more effective and potentially safer for your paint. Consider this a “maybe in a pinch” hack rather than a go to solution.
Hack #9: Cleaning Headlights with Toothpaste
Are your headlights looking yellow and hazy? This oxidation not only looks bad but also reduces light output, making driving at night less safe. Believe it or not, regular white toothpaste (not gel, and preferably one with baking soda or mild abrasives) can help polish them. Clean the headlight first. Apply toothpaste to a soft cloth or even directly to the lens. Rub vigorously in circular motions for several minutes. You might need to add a little water to keep it workable. Rinse thoroughly and dry. You should see a noticeable improvement in clarity!
Restoring Clarity for Safer Driving
Why does toothpaste work? The mild abrasives in it gently buff away the oxidized layer of plastic. It’s essentially like wet sanding but on a much milder scale. For heavily oxidized lights, this might only be a temporary fix, and a dedicated headlight restoration kit will give longer lasting results (as they often include a sealant). But for mild hazing, the toothpaste hack is a quick, cheap, and surprisingly effective way to improve both appearance and safety.
Wheel and Tire Cleaning Hacks
Dirty wheels and dull tires can ruin the look of an otherwise clean car. Let’s get them shining!
Hack #10: Oven Cleaner for Seriously Grimy Wheels? (Proceed with Caution!)
This hack comes with a BIG warning. Some people swear by using oven cleaner (especially fume free varieties) to cut through thick, baked on brake dust on wheels. Brake dust is notoriously hard to remove. If you choose to try this, do it on cool wheels, work in a well ventilated area, wear gloves and eye protection, and never use it on painted, clear coated, or anodized wheels – it’s primarily suggested (cautiously) for basic alloy or steel wheels. Spray it on, let it sit for only a minute or two (don’t let it dry!), scrub vigorously with a stiff brush, and rinse *extremely* thoroughly. Oven cleaner is highly caustic and can permanently damage wheel finishes if used improperly or left on too long. Honestly, a dedicated, pH balanced wheel cleaner is a much safer bet. Consider this a last resort for truly neglected, non coated wheels, and test on a tiny hidden spot first.
Hack #11: DIY Tire Shine for a Budget Glow
Want that deep black, satin finish on your tires without buying expensive tire dressing? There are a few DIY options. One popular method involves mixing castor oil (available at pharmacies) with a bit of rubbing alcohol in a spray bottle. The alcohol helps clean the tire surface slightly and aids drying, while the castor oil provides a lasting, non greasy shine. Spray onto a sponge or applicator (not directly onto the tire to avoid overspray onto wheels/paint), wipe onto the tire sidewall, and let it dry. Avoid getting it on the tread. It gives a nice, natural looking finish without being overly glossy or slinging off easily.
Window and Glass Cleaning Hacks
Streaky windows are the worst! Visibility is key, so let’s get that glass crystal clear.
Hack #12: Vinegar and Water for Streak-Free Shine
Forget expensive glass cleaners. One of the oldest and best hacks is a simple mixture of equal parts white vinegar and distilled water in a spray bottle. Why distilled water? Tap water contains minerals that can leave spots. Vinegar cuts through grease, grime, and water spots effectively. Spray it on the glass (inside and out) and wipe with one microfiber cloth, then buff dry with a separate, clean microfiber cloth for a perfectly clear, streak free finish. It’s cheap, effective, and doesn’t contain harsh chemicals.
Hack #13: Newspaper for Polishing? (Old School Trick)
Here’s another classic hack: using crumpled newspaper (black and white print only, not glossy ads) to wipe windows dry after cleaning. Does it work? Yes, surprisingly well sometimes! The paper is absorbent, and the texture can help buff away final streaks, leaving a clear finish. Some argue modern microfiber towels are superior (and less messy, as newspaper ink can sometimes transfer to your hands or window seals), but if you’re out of clean cloths, it’s a viable old school trick to try after using your vinegar spray.
Putting It All Together: A Routine That Works
Okay, we’ve got a bunch of awesome hacks. But how do you incorporate them into a regular cleaning routine? Here’s a suggested flow:
- Interior First: Start inside to avoid dripping water onto your clean exterior later. Remove trash and floor mats.
- Blast & Vacuum: Use compressed air on vents and crevices, then vacuum everything thoroughly – carpets, seats, trunk. Use the baking soda hack now if needed for odors or stains.
- Wipe Down: Use your preferred cleaner (or the olive oil hack sparingly) and microfiber cloths to wipe down the dashboard, console, door panels. Use the magic eraser for scuffs and the toothbrush for tight spots.
- Windows Inside: Clean the inside of the windows using the vinegar/water spray and microfiber towels (or newspaper).
- Exterior Wash: Now move outside. Rinse the car, use the two bucket method with car wash soap.
- Decontamination (as needed): Tackle bugs and tar (WD-40 carefully, or dedicated remover). Use the clay bar if the paint feels rough. Clean headlights with toothpaste if hazy.
- Wheels & Tires: Clean wheels (safest with wheel cleaner, use oven cleaner hack with extreme caution if necessary). Clean tires and apply DIY shine.
- Rinse & Dry: Rinse the entire car thoroughly. Dry using plush microfiber drying towels to prevent water spots.
- Windows Outside: Clean the exterior glass last with your vinegar mix.
- Final Touches (Optional): Apply a spray wax or sealant for protection and extra shine.
You don’t need to do every single hack every time, but incorporating them when needed makes the whole process much more efficient and effective!
Conclusion: Your Car Will Thank You
So there you have it – a whole arsenal of car cleaning hacks to keep your ride looking its best without emptying your wallet or spending your entire weekend scrubbing. From using household staples like vinegar and baking soda to clever techniques involving toothbrushes and compressed air, cleaning your car can be smarter, not harder. Remember, a clean car isn’t just about looks; it’s about preserving its value, extending its life, and making your driving experience more enjoyable. Give these hacks a try, find your favorites, and enjoy that sparkling clean feeling. Your car (and your wallet) will definitely thank you!
Frequently Asked Questions (FAQs)
1. Is it really safe to use household items like vinegar or WD-40 on my car?
Generally, yes, but with caution and common sense. White vinegar diluted with water is safe for glass and many interior surfaces (test first!). WD-40 can be effective for bugs/tar but must be washed off thoroughly immediately after use as it’s a solvent. Baking soda is great for odors and fabric stains. Always test any DIY solution in an inconspicuous area first, and avoid harsh chemicals like dish soap on paint or undiluted solvents on sensitive materials.
2. How often should I use these cleaning hacks?
It depends on the hack and your car’s condition. Basic cleaning like vacuuming and wiping down surfaces should happen regularly (weekly or bi weekly). Odor removal (baking soda) or stain treatment should be done as needed. Deep cleaning hacks like clay barring or headlight restoration might only be necessary once or twice a year. Listen to your car – if it looks dirty or feels rough, it’s time for some cleaning!
3. Can the toothpaste headlight hack damage my headlights?
When done correctly (using non gel paste, rubbing gently, rinsing thoroughly), it’s unlikely to cause damage. It’s a very mild abrasive. However, it’s removing a tiny layer of oxidized plastic. Doing it excessively might thin the plastic over time, but occasional use for mild hazing is generally considered safe and effective. For severe oxidation, a proper restoration kit with a sealant is a better long term solution.
4. What’s the single most important car cleaning hack?
While subjective, arguably the most impactful “hack” for exterior paint preservation is adopting the two bucket wash method. Using one bucket for soapy water and a separate one with clean water to rinse your wash mitt *before* putting it back in the soap drastically reduces the amount of dirt you rub back onto the paint, minimizing swirl marks and scratches. It’s simple, cheap, and makes a huge difference in maintaining your paint’s finish.
5. Are magic erasers safe for all car interior surfaces?
No, not always. Magic erasers (melamine foam) are mildly abrasive. They work wonders on hard, durable plastics and vinyl for removing scuffs. However, use them very gently and test first, especially on darker plastics (they can sometimes dull the finish), leather (they can remove the top coat/dye), or painted interior trim. Avoid using them on delicate screens or glossy surfaces.


