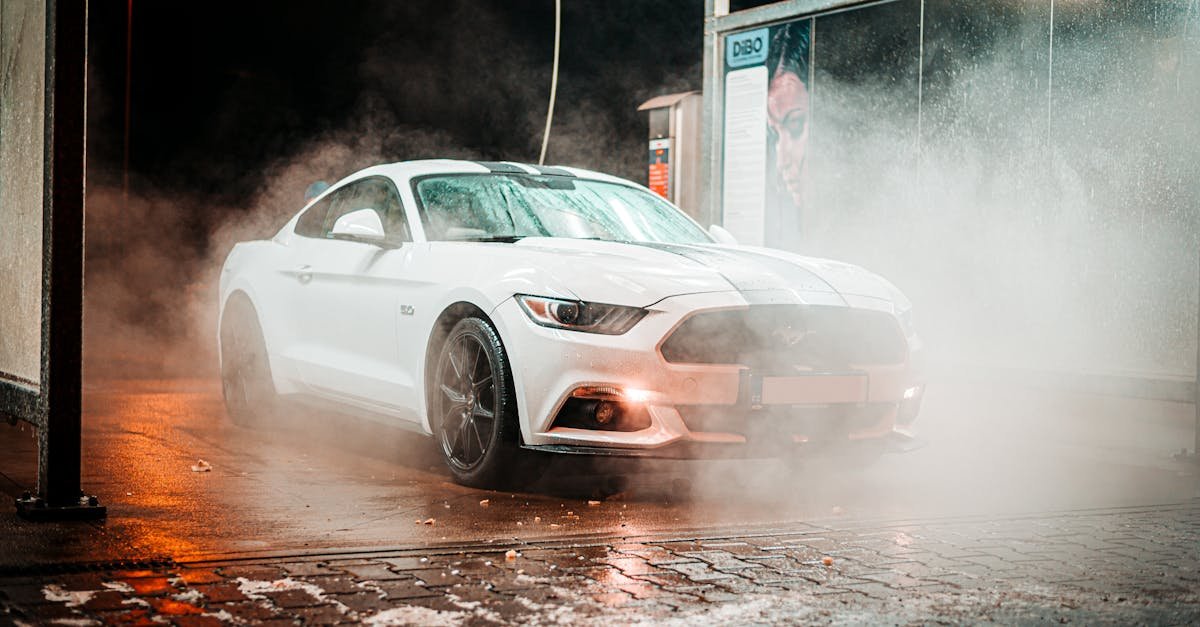
How To Wash Your Car Like A Pro: Beyond the Bucket and Sponge
Let’s be honest, seeing your car gleaming under the sun, looking like it just rolled off the showroom floor… that’s a good feeling, right? But achieving that truly professional, swirl free shine involves more than just grabbing a bucket, some random soap, and an old sponge. Many of us treat car washing as a chore, a quick splash and dash to get the worst of the dirt off. But if you want to really care for your car’s finish, protect its value, and experience that deep satisfaction of a job well done, washing it like a pro is the way to go. It’s not necessarily about spending hours upon hours, but about using the right techniques and products. Ready to elevate your car washing game? Let’s dive in!
Why Bother Washing Your Car Like a Pro? (More Than Just Looks)
Sure, a clean car looks fantastic. It turns heads and makes you feel good driving it. But the benefits of a proper wash go way beyond aesthetics. Think of it as preventative maintenance for your car’s exterior.
Protecting Your Investment: Paint Preservation
Your car’s paint isn’t just there for color; it’s the first line of defense against the elements. Dirt, grime, bird droppings, bug splatters, tree sap, and road salt aren’t just ugly – they’re corrosive. Bird droppings, for instance, are highly acidic and can etch into your clear coat surprisingly quickly if left untreated. Road grime often contains tiny metal particles from brake dust, which can embed themselves in the paint. Regular, proper washing removes these contaminants before they can cause permanent damage, like etching, staining, or rust spots forming where the paint has been compromised. Protecting the paint helps maintain your car’s resale value significantly. A well maintained exterior suggests a well maintained vehicle overall.
Spotting Potential Problems Early
When you’re methodically washing your car, you’re getting up close and personal with every panel, nook, and cranny. This is the perfect opportunity to notice things you might otherwise miss. Is there a small scratch that needs touching up before it rusts? Is a piece of trim coming loose? Are your tires showing signs of uneven wear or low pressure? Catching these little issues early can save you from bigger, more expensive problems down the road. Think of it as a regular check up for your car’s bodywork.
Pride and Joy: The Feeling of a Clean Ride
Okay, let’s not discount the emotional aspect. There’s a real sense of accomplishment and pride that comes from taking care of your vehicle. Driving a meticulously clean car just feels better. It shows you care about your belongings and reflects positively on you. Plus, the process itself can be quite therapeutic – a bit of mindful activity outdoors, transforming something dirty into something sparkling. It’s your ride, your investment, your freedom machine – doesn’t it deserve a little TLC?
Gathering Your Pro Car Washing Arsenal
Alright, convinced that a pro wash is worth the effort? Fantastic! Now, let’s talk tools. Using the right equipment is half the battle and makes a massive difference in achieving safe, effective results. Forget the single bucket and ancient sponge routine.
Buckets: The Two (or Three) Bucket Method Explained
This is non negotiable for a pro wash. You need at least two buckets, ideally with Grit Guards at the bottom. One bucket is for your soapy car wash solution (Suds Bucket), and the other is filled with plain water (Rinse Bucket). Why two? You dunk your wash mitt into the suds, wash a section of the car, and then – this is crucial – you rinse the dirty mitt thoroughly in the Rinse Bucket before putting it back into the Suds Bucket. The Grit Guard helps trap the dirt and grit released from the mitt at the bottom of the Rinse Bucket, preventing it from getting back onto your mitt and then scratched into your paint. Some pros even use a third bucket specifically for wheels, which tend to be the dirtiest part of the car.
Wash Mitts vs. Sponges: Making the Right Choice
Ditch the traditional sponge! Sponges, especially cheap ones, have flat surfaces that trap dirt and grit directly against the paint as you wipe, essentially acting like sandpaper. Ouch! A high quality microfiber or lambswool wash mitt is far superior. The long, soft fibers lift dirt away from the surface and trap it deep within the mitt, minimizing the risk of scratching. Get a couple so you can switch to a clean one if one gets too dirty or if you drop it (never use a dropped mitt without thoroughly cleaning it!).
Car Wash Soap: Why pH Neutral Matters
Step away from the dish soap! While great for greasy pots and pans, dish soap is designed to strip away everything, including the essential waxes and sealants protecting your car’s paint. Using it will leave your paint vulnerable. Always use a dedicated car wash soap. Look for pH neutral formulas – these are gentle on your paint and won’t strip existing protection. They create lubrication, allowing your wash mitt to glide smoothly over the surface, further reducing the risk of scratches.
Wheel Cleaners & Brushes: Tackling the Toughest Grime
Your wheels live a hard life, constantly bombarded with brake dust (which is hot, metallic, and corrosive), road grime, and tar. Regular car wash soap often isn’t strong enough to tackle this baked on mess. Invest in a dedicated, pH balanced or acid free wheel cleaner suitable for your specific wheel type (painted, chrome, polished aluminum – check the label!). You’ll also need brushes: a larger, soft bristled brush for the wheel faces and a smaller, stiffer brush (like a detail brush or even a sturdy paintbrush) for lug nuts and intricate areas. A long handled, soft brush for cleaning inside the wheel barrels is also a great addition.
Drying Towels: Microfiber is King
Forget old bath towels or chamois leathers! Bath towels can be surprisingly abrasive, and chamois (real or synthetic) can lack absorbency and potentially drag missed grit across the paint. The undisputed champion for drying is a large, plush, high quality microfiber drying towel. Look for towels with a high GSM (grams per square meter) rating – usually 500 GSM or higher – as these are the most absorbent and softest. Waffle weave microfiber towels are also excellent for drying, especially glass. Get at least one large towel for the main body panels and a smaller one for door jambs and tricky spots.
Optional but Awesome Extras (Clay Bar, Foam Cannon, etc.)
Want to take it to the next level? Consider these:
Foam Cannon/Foam Gun: Attaches to your pressure washer (cannon) or garden hose (gun) to pre soak the car in a thick layer of suds. This helps loosen and lift dirt before you even touch the car with a mitt, significantly reducing scratch potential.
Clay Bar/Clay Mitt: Used after washing but before waxing/sealing. A clay bar removes embedded contaminants (industrial fallout, rail dust, paint overspray) that washing alone can’t shift, leaving the paint incredibly smooth. Use with a dedicated clay lubricant.
Bug and Tar Remover: A specific spray to dissolve stubborn bug guts and tar spots without harsh scrubbing.
Detailing Brushes: Small, soft brushes (like makeup or paintbrush style) for cleaning intricate areas like badges, grilles, and panel gaps.
Pressure Washer: Not essential, but makes rinsing quicker and more effective, especially for wheel wells and undercarriage. Use a wide fan tip and keep a safe distance from the paint.
The Pre Wash Ritual: Setting the Stage for Success
Before you even dip a mitt in soapy water, a little preparation goes a long way towards a safer, better wash.
Location, Location, Location: Shade is Your Friend
This is super important! Always try to wash your car in the shade or on a cool, overcast day. Why? Direct sunlight and hot surfaces cause water and soap to evaporate too quickly. This leads to ugly water spots (mineral deposits left behind) and can even bake soap residue onto the paint, making it difficult to remove. If shade isn’t possible, wash early in the morning or late in the evening when the sun is less intense and the car’s panels are cool to the touch.
The Initial Rinse: Loosening the Grime
Don’t just jump straight into scrubbing! Give your car a thorough rinse first, starting from the top and working your way down. Use your hose (or pressure washer on a low setting with a wide nozzle, keeping a safe distance) to blast away as much loose dirt, dust, and debris as possible. Pay attention to wheel wells, lower sills, and bumpers where dirt accumulates most heavily. This pre rinse step removes the larger abrasive particles, meaning less chance of scratching when you start washing with the mitt.
The Main Event: Washing Your Car Step by Step
Okay, supplies gathered, car rinsed, shade secured. It’s time for the main wash! Follow these steps for a systematic, safe approach.
Step 1: Wheels First – Always!
Why wheels first? They are usually the dirtiest part of the car, covered in brake dust and road grime. Washing them first prevents splashing this nasty stuff onto your just cleaned paintwork. Plus, the dedicated wheel cleaners often need a little dwell time to work their magic.
Rinse the wheels thoroughly.
Spray your chosen wheel cleaner generously onto one wheel (and inside the barrel if possible). Let it sit for the recommended time (usually 30 seconds to a few minutes – read the label!), but don’t let it dry.
Use your wheel brushes to agitate the cleaner. Start with the larger brush for the face and barrel, then use the smaller detail brush for lug nuts, spokes, and calipers.
Rinse the wheel, tire, and wheel well thoroughly.
Repeat for the other three wheels.
Using a separate bucket and mitt/brushes just for wheels is highly recommended to avoid transferring brake dust grit to your paintwork bucket.
Step 2: The Two Bucket Method in Action
Now for the bodywork. Get your two buckets ready: one filled with your car wash soap solution (follow the dilution ratio on the bottle) and the other with clean rinse water. Ideally, both have Grit Guards.
Suds Bucket & Rinse Bucket Logic
The process is simple but critical:
Dip your clean wash mitt into the Suds Bucket, loading it up with soapy water.
Gently wash one section of the car (e.g., half the roof, one door panel). Use straight line motions, not circular scrubbing, as this can create swirl marks. Let the soap and mitt do the work; minimal pressure is needed.
Before going back for more soap, dunk the dirty mitt into the Rinse Bucket. Rub it against the Grit Guard (if you have one) to release trapped dirt.
Wring out the mitt slightly.
Now, go back to the Suds Bucket for fresh, clean soap.
Repeat the process, washing another section.
This constant rinsing of the mitt in the clean water bucket is the heart of preventing scratches. You’ll be amazed (and horrified) at how dirty the rinse water gets!
Washing Top Down – Gravity is Your Ally
Always wash your car from the top down. Start with the roof, then the windows, hood and trunk, upper sides, and finally the lower sections (bumpers, rocker panels, lower doors). Why? Gravity! The dirtiest parts of your car are usually the lowest sections. Washing top down ensures that dirty water and grime run downwards, away from the areas you’ve already cleaned. If you wash the bottom first, you risk dragging that heavy grit up onto the cleaner upper panels with your mitt. Work in manageable sections, rinsing the mitt frequently.
Step 3: Rinsing Thoroughly
Once the entire car is washed, it’s time for the final rinse. Don’t let the soap dry on the paint! Rinse thoroughly from the top down, ensuring all soap residue is washed away. Pay attention to panel gaps, mirror housings, grilles, and badges where soap likes to hide. A good technique for the final rinse is to remove the nozzle from your hose and let the water flow freely over the panels in sheets (often called ‘sheeting rinse’). This helps pull more water off the surface, minimizing the amount left to dry and potentially spot, making the drying process easier.
Drying Without Scratches: The Secret Sauce
Believe it or not, improper drying is one of the biggest culprits for inflicting swirl marks and fine scratches on paintwork. Doing it right is crucial for that flawless finish.
Microfiber Madness: Techniques for a Spotless Finish
Grab your large, plush microfiber drying towel(s). There are a couple of effective techniques:
The Pat Down/Blotting Method: Lay the towel flat over a section (like the hood or roof) and gently pat it down. Lift the towel, move to the next section, and repeat. This minimizes friction.
The Gentle Drag: Lay the towel flat and gently pull it across the panel in one direction. Use the weight of the towel itself, applying minimal pressure. Flip the towel frequently to a dry side.
Avoid rubbing vigorously or using a circular motion. Start with the windows and roof, then work your way down. Use a separate, smaller microfiber towel for door jambs, trunk edges, and under the hood – these areas often hold water that can drip out later and cause streaks. Some people like to use a quick detailer spray or a drying aid spray misted onto the panel or towel while drying. This adds lubrication and can enhance gloss while helping the towel glide even more smoothly.
Using a Leaf Blower or Car Dryer?
For a truly touchless drying experience, especially effective for blowing water out of panel gaps, mirrors, badges, and grilles where towels can’t reach, consider using an electric leaf blower or a dedicated car dryer. Car dryers often have filtered air, which is ideal. If using a leaf blower, ensure it’s clean and preferably electric (gas blowers can sometimes spit out oily residue). This method drastically reduces the physical contact with the paint, minimizing scratch risk. It’s particularly great for intricate wheels too!
Finishing Touches: Making it Shine
The washing and drying are done, but a few final steps really elevate the result from ‘clean’ to ‘professionally detailed’.
Cleaning Glass: Streak Free Visibility
Clean windows make a huge difference. Use a dedicated automotive glass cleaner (ammonia free is best, especially if you have tinted windows) and two microfiber towels – one for applying/cleaning and one for buffing dry. Spray the cleaner lightly onto the first towel (not directly onto the glass, especially inside, to avoid overspray onto the dash). Wipe the glass thoroughly. Immediately follow up with the second, clean, dry microfiber towel to buff away any remaining residue for a streak free finish. Don’t forget the inside of the windows and the mirrors!
Dressing Tires (Without the Sling!)
Clean tires look okay, but dressed tires look amazing and complete the look. Tire dressing restores the deep black look and adds a layer of protection. Choose between water based (often a matte or satin finish, less prone to sling) and solvent based (usually glossier, can sometimes sling onto paintwork if over applied or not allowed to dry). Apply the dressing to a foam applicator pad or a dedicated tire dressing applicator, not directly to the tire. Wipe it evenly onto the tire sidewall (avoid the tread!). Apply thinly and evenly. Allow it to dry for the recommended time, then wipe off any excess with an old microfiber towel. This last wipe down is key to preventing messy ‘tire sling’ down the side of your clean car when you drive off.
Common Car Washing Mistakes to Avoid
Even with the best intentions, it’s easy to fall into bad habits. Here are some common mistakes that sabotage a pro level wash:
Using Dish Soap: Strips wax and sealant, leaving paint unprotected.
Using One Bucket: Reintroduces dirt and grit onto the paint via the wash mitt.
Using a Sponge: Traps dirt against the paint, causing scratches.
Washing in Direct Sunlight/Hot Surfaces: Causes water spots and baked on soap residue.
Using Bath Towels or Old T Shirts for Drying: Abrasive materials that cause swirls and scratches.
Dropping the Mitt and Reusing It: Puts picked up grit directly onto your paint. Clean it thoroughly or switch to a spare.
Neglecting the Wheels/Washing Them Last: Spreads heavy grime onto clean paint.
Not Rinsing Thoroughly Enough: Leaves soap residue that can etch paint or cause streaks.
Forgetting Door Jambs/Trunk Edges: Leads to dirty drips on clean paint later.
Avoiding these pitfalls is just as important as following the right steps!
Conclusion: Enjoy Your Sparkling Clean Ride!
Washing your car like a pro isn’t about having the most expensive gear; it’s about understanding the process and using the right techniques to protect your paint while getting it incredibly clean. By adopting the two bucket method, using quality microfiber mitts and towels, choosing the right soap, and paying attention to details like wheels and drying, you can achieve results far superior to a quick driveway splash or a trip through an automatic wash. It takes a bit more time and effort, yes, but the results – a gleaming, protected finish, the satisfaction of a job well done, and preserving your car’s value – are absolutely worth it. So, gather your supplies, wait for a shady spot, put on some music, and give your car the spa day it deserves. Happy washing!
Frequently Asked Questions (FAQs)
1. How often should I wash my car?
This really depends on your environment, how often you drive, and where the car is parked. As a general guideline, washing every two weeks is a good starting point for a daily driver. However, you should wash it sooner if it gets covered in contaminants like bird droppings, bug splatters, tree sap, or road salt, as these can damage the paint quickly if left sitting. If your car is garaged and only driven occasionally in good weather, you might stretch it to once a month.
2. Can I use dish soap to wash my car?
Please don’t! Dish soaps (like Dawn, Palmolive, etc.) are formulated to be strong degreasers. They will strip away any wax, sealant, or protective coating on your car’s paint, leaving it exposed to the elements. Always use a dedicated car wash soap that is pH neutral and designed specifically for automotive finishes.
3. What’s the difference between waxing and polishing?
Polishing and waxing serve different purposes. Polishing uses fine abrasives to remove imperfections like light scratches, swirl marks, oxidation, and water spots from the paint surface, restoring its gloss and clarity. Think of it as exfoliating the paint. Waxing, on the other hand, adds a layer of protection (using carnauba wax, synthetic polymers, or ceramic ingredients) on top of the paint. Wax doesn’t typically remove defects; it protects the polished (or existing) finish from UV rays, water, and contaminants, and it adds depth and shine. You generally polish first (if needed), then wax or seal.
4. Is it okay to wash my car in direct sunlight?
It’s strongly advised against washing your car in direct sunlight or when the paint surface is hot. The heat causes water and car wash soap to evaporate very quickly. This leads to stubborn water spots (mineral deposits) and can make soap residue difficult to rinse off completely, potentially even baking it onto the finish. Always try to wash in the shade or during cooler parts of the day (early morning/late evening).
5. Are automatic car washes bad for my paint?
While convenient, many automatic car washes (especially older ones with spinning brushes) can be harsh on your car’s paint. The brushes can be abrasive and may hold dirt and grit from previous vehicles, leading to swirl marks and fine scratches over time. Touchless automatic washes are generally safer, but the high pressure jets and strong chemicals used can sometimes strip waxes or sealants. For the best and safest results, hand washing using the proper techniques described in this article is always the preferred method for maintaining your paint’s condition.